Blog by John Dunsmuir
Browser UI Extensions: Establishing Best Practices for a Novel Framework
6 min read

Author: Andy Stevens
4 min read
BI Publisher is one of those tools which, with the right training and support, can quickly become an incredibly valuable part of your organisation's reporting suite. And, like any tool which becomes integral to your organisation, it is important to have a strategy in place to monitor its usage and performance. Unfortunately, OBIEE is not configured by default to track any BI Publisher usage or performance metrics; . One popular way to gather BI statistics is by enabling usage tracking - although it isn’t suitable for BI Publisher. Usage tracking gathers statistics about the queries sent to the BI server rather than any BI Publisher specific statistics. Some of your BIP reports may not even query the BI server especially if you’ve installed BI Publisher standalone.
The best way to gather BI Publisher related statistics is to enable Monitoring and Auditing. The Monitor and Auditing features of BI Publisher allow you to collect all sorts of useful statistics including:
In this two-part blog post I will take you through the steps involved in enabling BI Publisher auditing. In the first part (step 1 below) we will enable the basic BI Publisher auditing in which all statistics get written to a flat-file. In the second part, we will direct the auditing statistics to an Oracle database for better flexibility (steps 2,3,4). The high-level steps involved in setting up BI Publisher auditing are:
Note that I'll be using version 11.1.1.9 for this post but the steps for 11.1.1.7 are identical.
The first thing to do is navigate to BI Publisher to enable Monitor and Audit. Navigate to BI publisher by going to http://<hostname>:<port>/xmlpserver, click on Administration > Server Configuration.
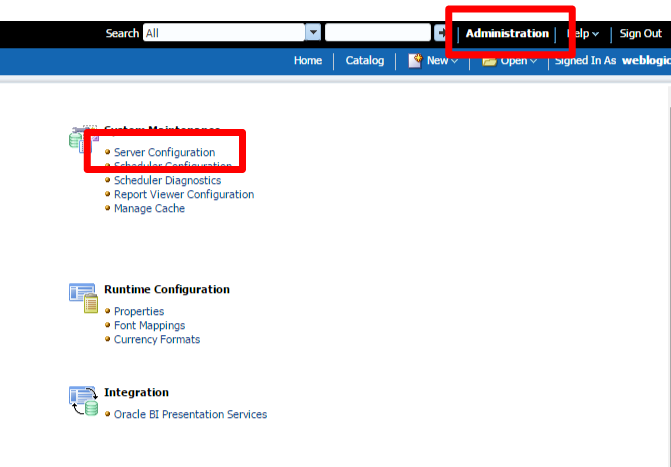
Fig 1. - The BI Publisher administration screen
At the bottom of screen check Enable Monitor and Audit and be sure to hit Apply when you've done that otherwise your changes will not be saved.
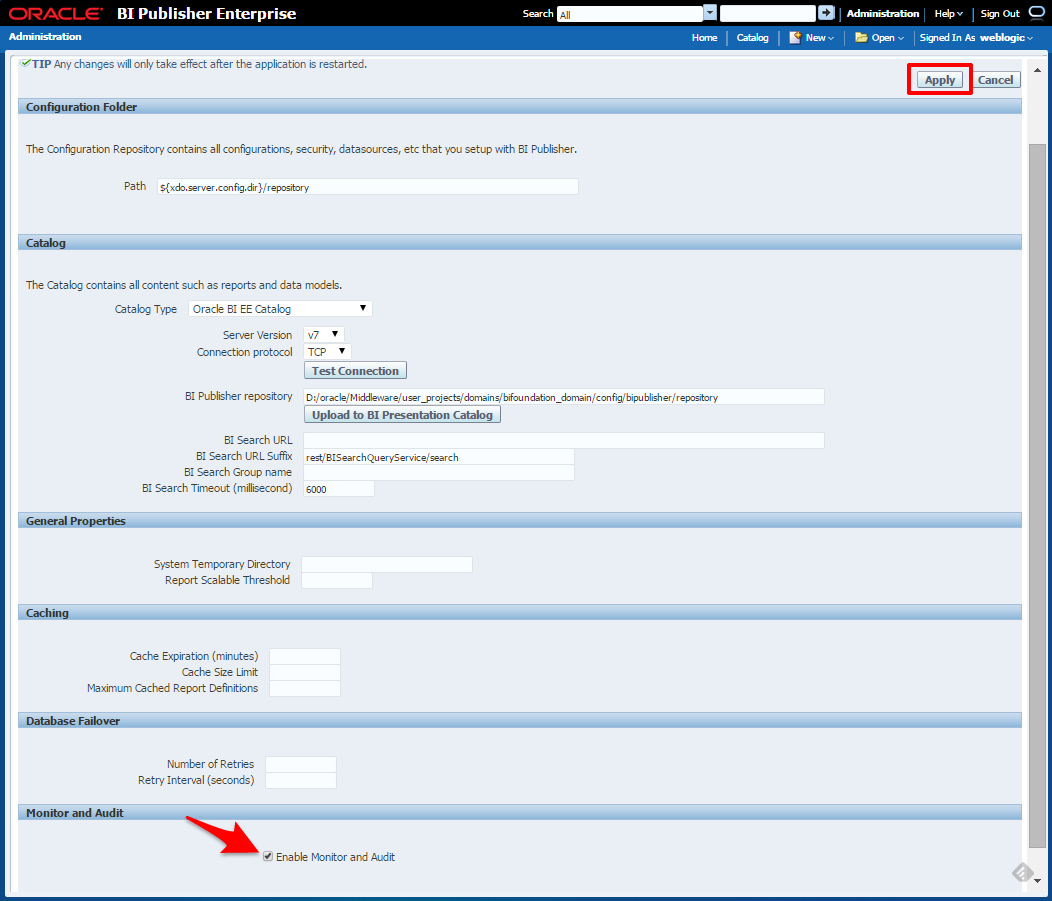
Fig 2 - The server configuration screen where you enable Monitoring and Auditing
Checking the Enable Monitor and Audit check box above will set the following attributes to True in your xmlp-server-config.xml file which is located at [MIDDLEWARE_HOME] \user_projects\domains\bifoundation_domain\config\bipublisher\repository\Admin\Configuration.
Note that if you are on version 11.1.1.6 or below you may have to update this file manually to include the highlighted XML fields below.
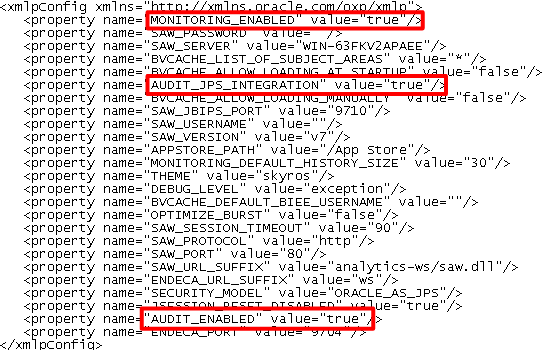
Fig 3 - The xmlp-server-config.xml file which is updated automatically in versions over 11.1.1.7
Now go into Enterprise Manager and expand the WebLogic Domain folder, right-click on bifoundation_domain and go to Security > Audit Policy.
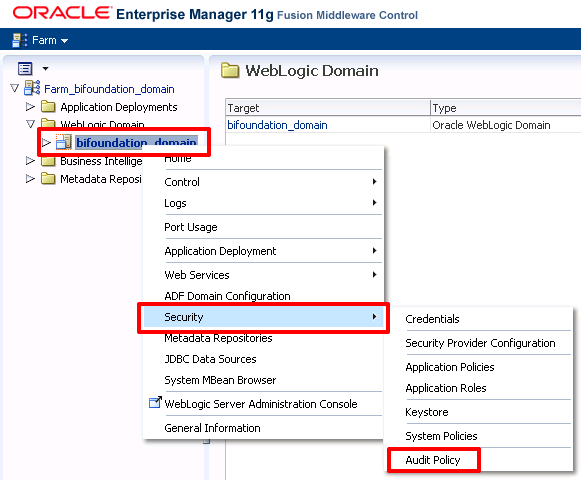
Fig 4 - Navigating to the Autit Policy screen through Enterprise Manager
From the Audit Component Name drop down box select BI Publisher Server, change the Audit Level to Medium and then click Apply at the top right of the screen.
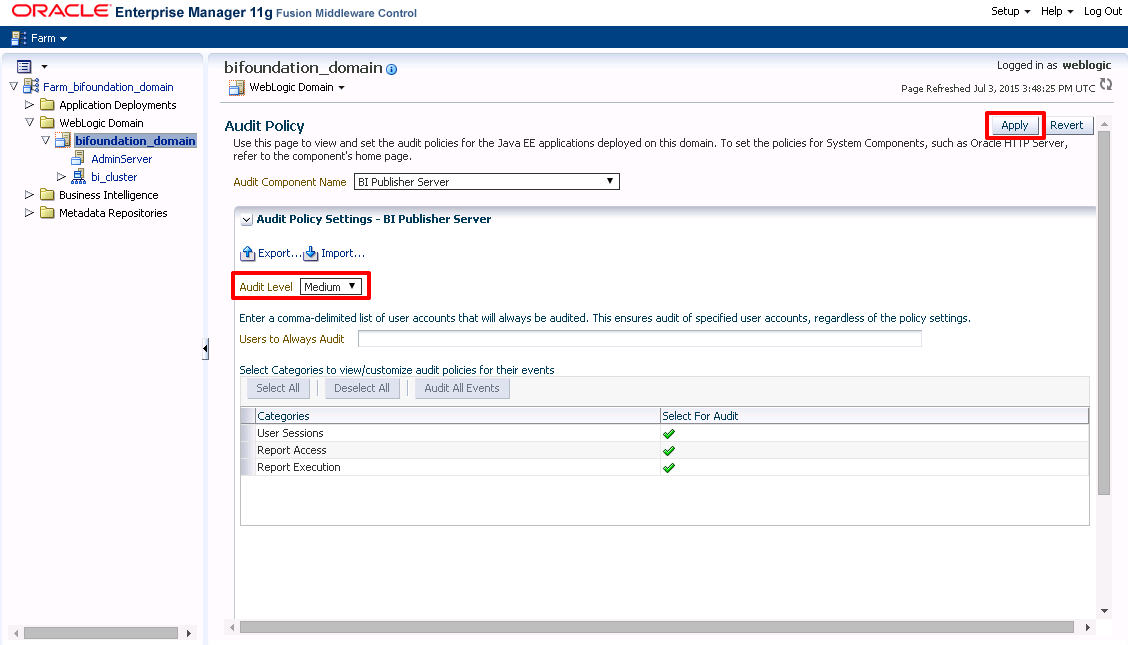
Fig 5 - Setting the Audit Level to Medium in Enterprise Manager
Restart the OBIEE components along with WebLogic. After starting OBIEE back up you'll notice that there is now a file called audit.log at the following location:
[MIDDLEWARE_HOME] \user_projects\domains\bifoundation_domain\servers\bi_server1\logs\auditlogs\xmlpserver
Note that in versions prior to 11.1.1.7 the location of the audit file may be located at:
[MIDDLEWARE_HOME] \user_projects\domains\bifoundation_domain\servers\AdminServer\logs\auditlogs\xmlpserver
To check if auditing is working correctly lets create some audit entries in the audit.log file. Log into BI Publisher and then log back out again (http://localhost/xmlpserver). After logging out check the audit.log file, you should see two entries similar to the following:
![]()
Fig 6 - Log entries in audit.log showing the Weblogic user logging in and out
If everything is working fine you'll start to see your audit.log file fill up with all sorts of useful statistics to report on; however, if you want to report over these statistics your options are quite limited. Using tools like Elasticsearch/Logstash/Kibana (ELK) you can report directly over the audit.log file but why introduce another reporting tool into the mix when you’ve already got a great one at your disposal? Part 2 of this blog will take you through the steps required to push the audit.log data into a pre-built Oracle schema so that you can use BI Publisher or an Analysis to report over it.

Boxfusion Consulting are an Oracle Platinum Partner and are recognised by Oracle as Specialised in the implementation of Oracle BI technology. If you would like to hear more about how Oracle BI might be used to help your business please give us a call on +44 203 283 4315 or contact us here!

6 min read
4 min read
The latest version of Siebel has many great architectural features to improve support...
2 min read